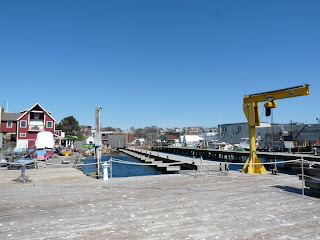
Today we checked out a fishing vessel in Scituate that looks like it will make an excellent base of operations for our trip in August surveying didemnum growth.
The boom has great reach and can hoist 5000 lbs!
Found a Good Boat
Wednesday, April 29, 2009
A few new features to pHelmSG
One of the most annoying dangerous things about operating our vehicle is having typos in the mission script. When coding up the string of behaviours that are collectively a mission, an inadvertent typo or even just an oversight can lead to the mission ending too soon, critical behaviours not getting called, etc. There has never been any way for the user to get any kind of feedback of the text-based mission script, other than checking it twice... & then a third time.
To remedy this, I added a mission preview feature. The missions now generate a text-based mission graph & transmit it (through a MOOS variable called MISSION_CHART) to the GUI app running on the operator's console. The GUI then generates a preview image using the GraphViz, and displays it for the operator... before they hit the "START" button.
Here's an example:
In this example, the AUV dives down to 4.5 meters of alititude, then maintains 2.5, then 2.0, then 1.5 meters, before surfacing. You'll notice the various safety behaviours running in addition to the main mission, as well.
There are certainly some improvements to be made. I'd like the flag-nodes in the chart to be much less prominent than the behaviour-nodes. Also, the behaviours-nodes should give some more description of the behaviour's attributes. The hooks are already in the behaviour-base class to do this... I just need to write it into the child behaviours themselves.
In looking at the above example, you may have noticed (if you are at all familiar with looking at MOOS scripts), that the various behaviours now have more than one way of exiting. Successful completion, timing out, & error conditions all throw different flags. I've often had a behaviour timeout, or worse, fail & then the mission proceeds to the next behaviour as if it were successful. I'd prefer to have a little more control over the program flow when a behaviour is running.
Coming soon: loopable behaviours.
It Went "POP" and Died
Monday, April 27, 2009
On Friday afternoon, while preparing for this week's in-water testing, there was a loud "POP", and a few seconds later the benchtop power supply's current-limit light turned on.
Uh oh.
Today we went about troubleshooting it. When we opened the main pressure housing, the smell of burnt electronics was noticeable (it soon dissipated).
The current limit on the benchtop power supply was lower than that of some of the fuses on the vehicle, so it was a simple matter of taking fuses out one by one to determine which component was shorting. It turned out to be one of the Parker Driveblok units.
The most likely explanation for the short was a failed capacitor. The Drivebloks have replaceable capacitor banks, so that was the first thing we checked.
This is the old capacitor bank, and the failed capacitor is quite noticeable. Not only does it have a considerable bulge overall, there is one spot with a prominent outward dent.
The reason for the failure is currently unknown. However, we did notice that the water blocks between each pair of Drivebloks were vapor locked -- the coolant enters and leaves on the bottom of each water block, and the top part had filled with air -- preventing any coolant from flowing. The rise in temperature may have contributed to the failure.
After putting in one of our spare capacitor banks, the system seems functional again.
Posted by Ian at 4:56 PM
Labels: capacitor, troubleshooting
Finding a Test Site
Friday, April 24, 2009
Today we checked out the Gloucester Maritime Heritage Center as a possible place to do basic vehicle testing. After talking with the nice folks who work there (as well as the Harbormaster and Coast Guard), we are all set to go next week! There is plenty of room on the pier for us to set up a tent with all of our stuff.
There is also a good crane for lifting the AUV in and out of the water.
The pier is fairly long, and although we won't be doing much work in this narrow patch of water, it's a convenient place to trim and do basic tests before we turn it loose in a larger area.
Posted by Ian at 3:55 PM
Labels: gloucester, test site
3D-printed Recovery Cage
Thursday, April 23, 2009
Here's a timelapse video of the 3D printing process for a model of a vehicle recovery system.
This is the finished product with the support material dissolved away.
The design is meant to guide the vehicle into a solid structure that can survive some rough handling as it is pulled up onto the deck of a support ship.
Posted by Ian at 5:44 PM
Labels: 3d printer, model, timelapse
RTU Stress Testing
Wednesday, April 15, 2009
This is a video of our RTU doing some basic movements. Previously, we had a problem with the high torque of the motor putting enough strain on its fasteners to work them loose. So, after some adjustments to the motor controller (clamping maximum acceleration, adjusting damping, etc), it's time to find out how well they work.
Basically, we just rotate the RTU motor back and forth between two positions for a half hour.
The tapping sound you hear is coming from the hard stop that the motor makes. It took a bit of adjusting to prevent ringing -- that is, to prevent the momentum of the thrusters from causing the RTU motor to overshoot and wiggle to a stop.
The plastic bags covering the thrusters are keeping the pressure-compensating oil from slowly dripping onto the floor, and the thrusters are mounted in opposing directions for balance; normally, they would face the same way.
Posted by Ian at 2:21 PM
Time-lapse video of a 3D printing job
Friday, April 10, 2009
This is what a 7 hour build looks like on our new 3D printer (filmed at 1 frame per minute).
Posted by Ian at 11:35 AM
Labels: 3d printer, timelapse, video
Coolant Reservoir
Wednesday, April 8, 2009

Posted by Ian at 9:59 AM
Labels: reservoir, water cooling
Our New 3D Printer Has Arrived
Tuesday, April 7, 2009
Today, the lab got a 3D printer delivered (and assembled)!
This is a fairly amazing machine -- able to turn computer-drawn models into physical objects in ABS plastic! What makes this significant is the fact that ABS plastic is strong enough to be used in production parts, not just prototypes or mock-ups.
The most likely use for this machine will be to print "mechanical fuses" -- parts that are designed to fail early in order to protect more complex or expensive parts -- because it will make it easy to fabricate identical replacement fuses.
The printer works by extruding a very thin (0.01 inch) bead of plastic out of a heated tip. Layer by layer, the printed item is built up.
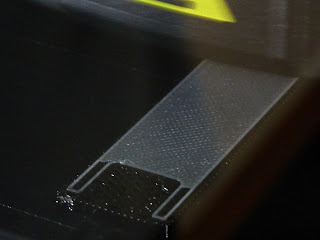
You can see the criss-cross pattern here, created from the first 2 layers of white plastic. The black plastic underneath is for support, and is removed (dissolved in a caustic bath) after the printing is complete.
Posted by Ian at 7:34 PM
Visitors from Essex Aggie!
Friday, April 3, 2009

We were excited to show these kids all the cool stuff that our vehicle does... maybe a little too excited, since it's rare that people come in to check it out all the hard work that we do.
Hopefully they'll stay in touch! We'll need a new crop of vehicle engineers in a few years.


